Thank you to Jodi from Meaningful Mama for sharing this idea, the Gospel, and your nativity silhouette printable. For full craft instructions, be sure to head over to her blog.
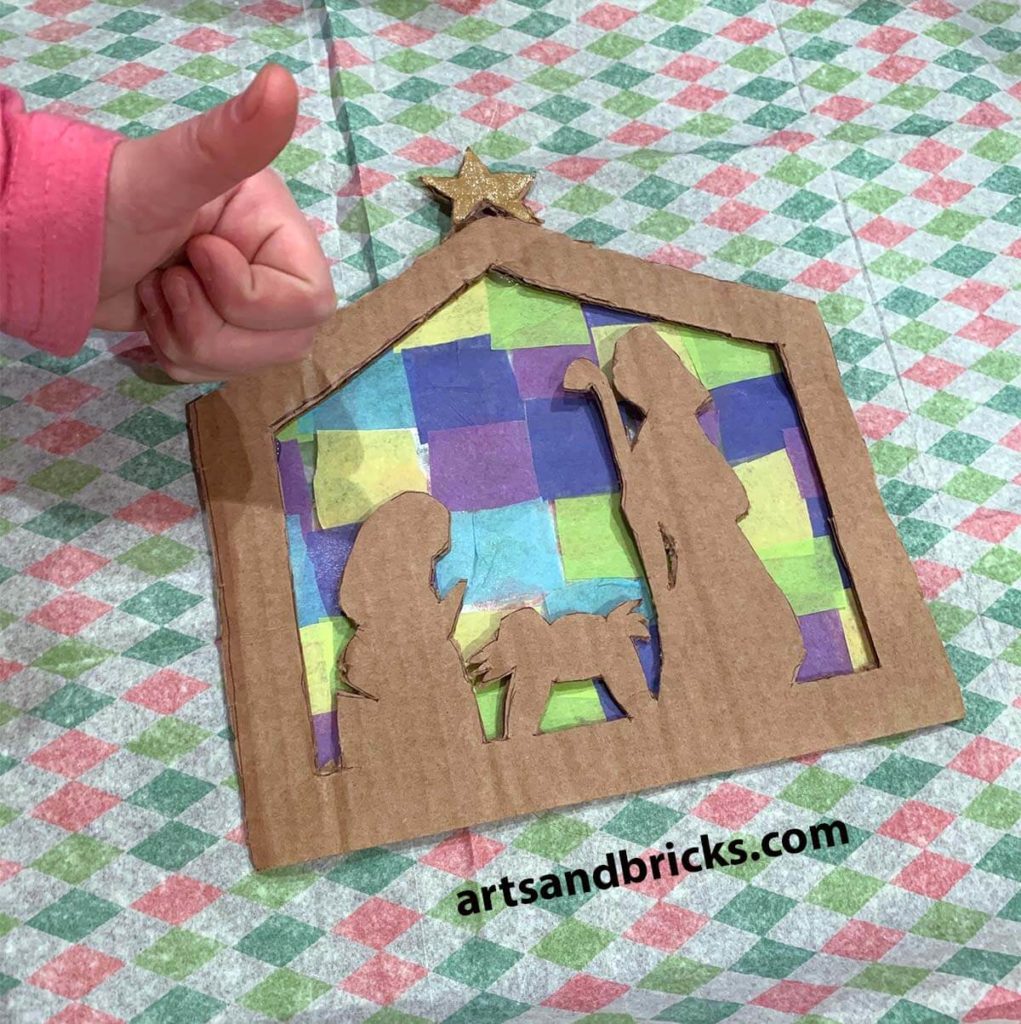
This year, I asked my 4th-grade son to make a gift for his teacher to accompany our gift card and note. He decided to make this Mosaic Nativity Hanging Ornament.
I love the simple concept of making stained glass crafts with kids using contact paper and colorful tissue paper. It’s an accessible craft for preschoolers and elementary-aged kids alike!
Here’s how we made it:
Project Materials
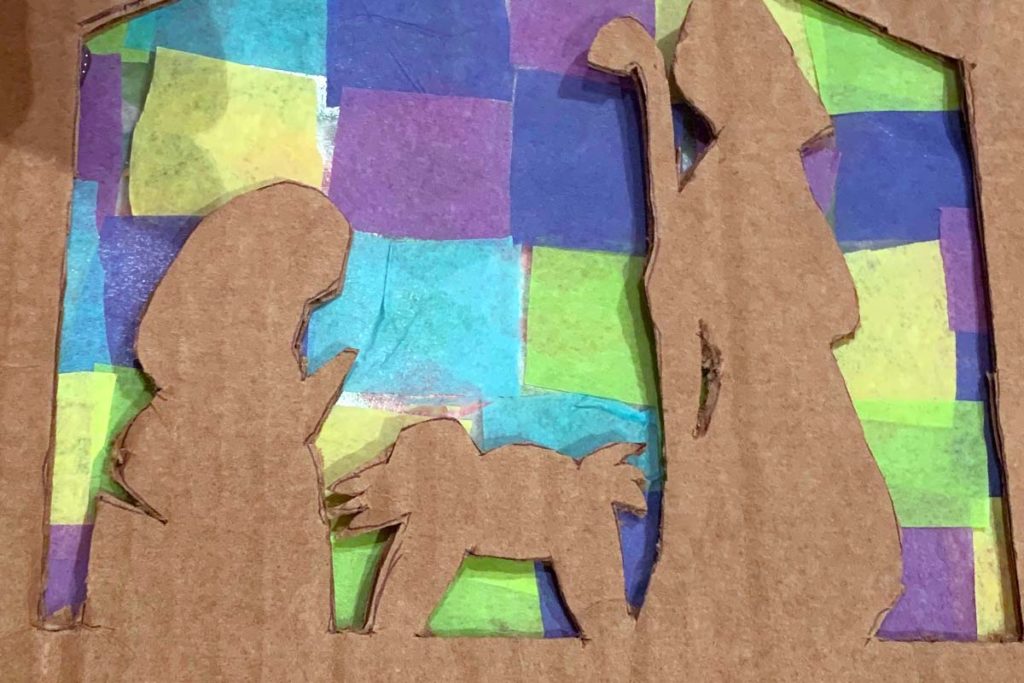
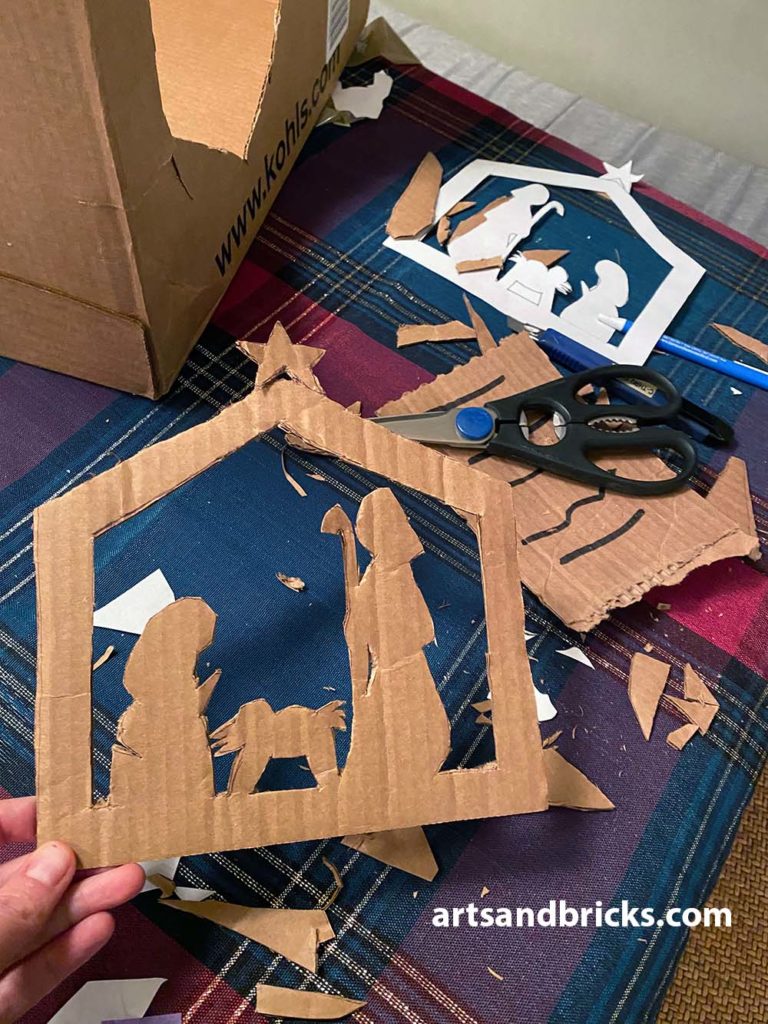
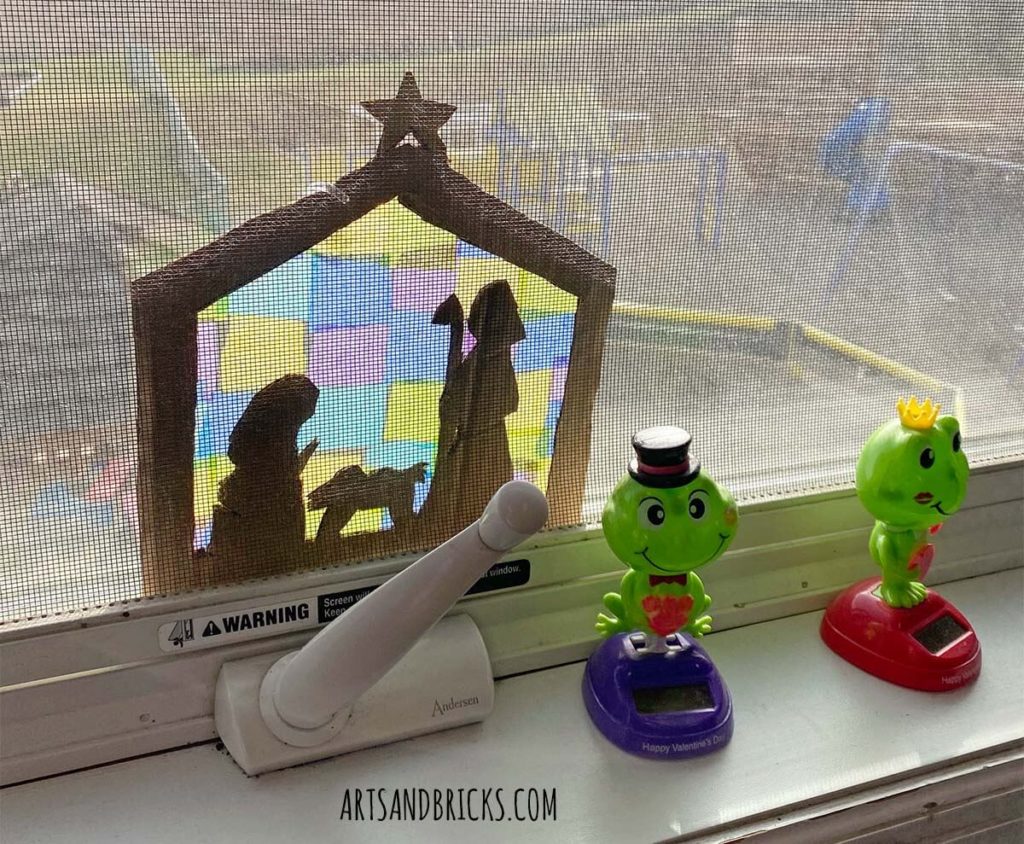
Instead of using black card stock to create the nativity silhouette, my son chose a brown cardboard box as the frame for his project.
We used Meaningful Mama’s printable, which includes many small details that were tough to cut out of cardboard with scissors. I wound up helping my son by cutting the finer details with a Xacto knife.
Our process was printing the nativity scene on white paper from our inkjet printer and then cutting out the silhouette to make a stencil. My son used the stencil to trace the scene on the cardboard and then cut out the cardboard.
It turned out very well!
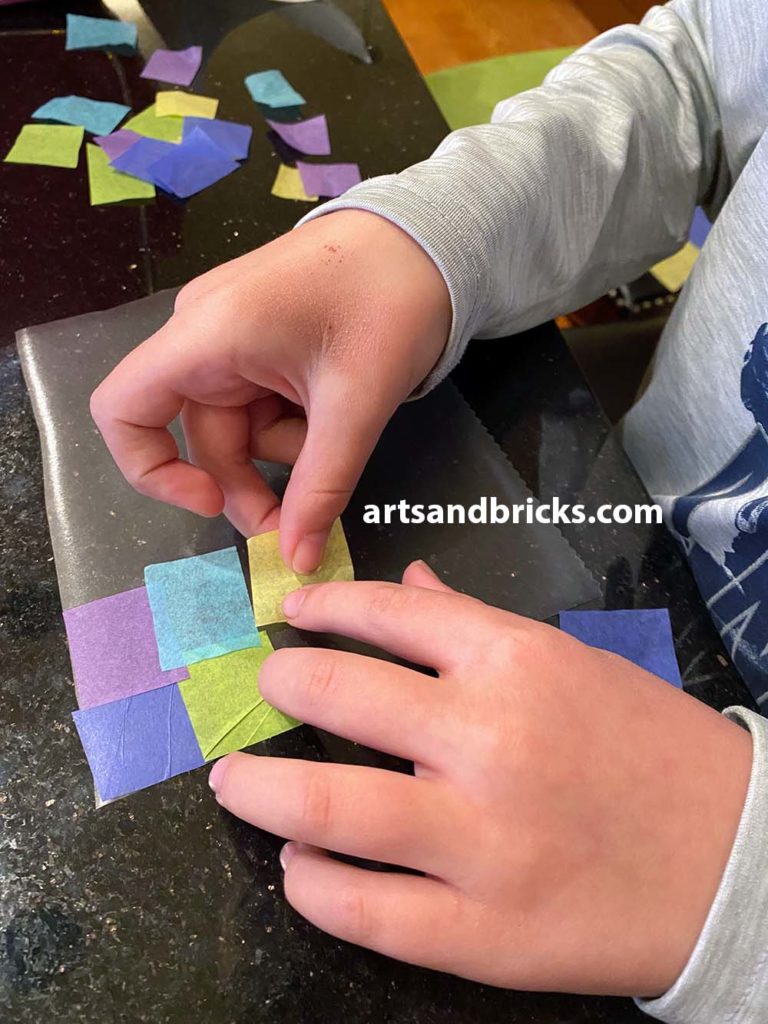
Stained Glass Christmas Craft
We purchased a tissue paper sleeve from the local dollar store and cut our colorful tissue paper into about 1-inch squares. You can also find pre-cut squares of tissue paper on Amazon.
Contact paper is a clear one-sided adhesive. It’s perfect for attaching thin tissue paper. You can always add a second layer of contact paper to the back of your mosaic, which essentially sandwiches your tissue paper mosaic.
As an alternative to using contact paper, you can use wax or parchment paper and clear tape or glue to attach your tissue paper.
On a side note: I remember contact paper from my childhood; the contact paper featured bold patterns, and we attached it to the bottom of our drawers and cabinets. How about you? Did you grow up using contact paper, too? Kids from the ’80s, raise your hands high!
Finishing Touches
- We used hot glue to attach the contact paper to the back of the nativity silhouette.
- We also tied a piece of fishing wire into a loop and attached the circle to the ornament’s back with hot glue.
- We used our favorite glitter gel pens to color the star sparkly and gold!
- My son wrote a sweet message and dated the back of the art project gift with Sharpie.
- We also added a clear plastic hanging suction cup to the present so his teacher could easily display it from a window.
We hope you enjoy this modified stained glass nativity craft.
As always, we’d love to see what you make. Would you please tag us with @artsandbricks?

Leave a Reply